Showing posts with label aa Chapt 7c Entrees. Show all posts

Tuesday, September 17, 2013

Vegan MOFO: Love Me Tender Taco Tuesday–CocoBacoAvoDilla


Este no es su mama la quesadilla!
(This is not your mama's quesadilla!)

It's kind of like a quesadilla, kind of like a BLT. It's good with just the cheese, better with the bacon, and best with the avocado. Avocado makes everything right, doesn't it? Do yourself a favor and order some Coconut Bacon from Phoney Baloney. Keep it in the pantry, but not in really easy reach, 'cause they are too easy to eat as a snack. Top shelf. The one you need a stool for. Because you want to save them for stuff like this...or anything else you suddenly think of that "bacon" might taste good on. No I haven't tried it on ice cream yet...but hey, thanks for the idea!

CocoBacoAvoDilla
Makes 1 serving

1 tortilla (flour or Gluten-free*)
1 Tbs  Phoney Baloney Coconut Bacon
1/4 cup shredded Non-dairy Cheese (I like Daiya or Trader Joe's Mozzerella)
1/4- 1/2 avocado, cut in slices

Hot sauce optional.

Directions:
Place cheese shreds on half the tortilla. Cover with coconut bacon. Place in microwave or toaster oven unfolded. Cook until cheese melts (about 1 minute in micro, about 5-7 minutes in toaster oven toast setting). Before folding, place avocado on the cheese/bacon. Fold in half, cut into four triangles.

 (These are shown made with the wheat flour tortilla.)


Be sure to check out Phoney Baloney's website/blog and Facebook page since there are nice photos and great ideas about how to use this product. Can anyone say "vegan bacon donut"?

*Today I used Engine 2 Plant Strong Brown Rice Tortillas as well as regular white wheat flour tortillas. The brown rice tortillas are OK, not great. I haven't found a nice, soft vegan, gluten-free tortilla anywhere. (Planning on making my own--maybe that's next week's post!). I guess am getting used to the harder rice tortilla and and it's not bad for a quesadilla, just a bit chewy. Found at Whole Foods.
 

Monday, September 16, 2013

Vegan MOFO: Monday Mash-up–JL's Soy Curls Salad


 I met JL Fields at the first ever Vida Vegan Bloggers Con in Portland in 2011, lounging by the pool (although she had her laptop with her, so I'm not convinced she was doing much lounging).

Since then she has really taken off with veganism not only as her lifestyle, but her life's work. Please visit her blog...she has co-authored a book, writes daily about food and for Vegan MOFO 2013, is video-blogging nearly every day. (JL Goes Vegan: Food and Fitness with a Side of Kale)

Last week I watched her prepare Soy Curls Salad, and was inspired to make it since I had all the ingredients in the fridge and pantry, and I always take that as a I sign I should make the recipe!

Please visit her post to see the recipe and watch her make this very easy and (for some) comfort food salad.

My experience:
JL's Soy Curl salad couldn't be easier to prepare! Simple chopping or pulsing in a food processor gets your main ingredients chopped nicely (rehydrated soy curls, grapes and nuts.)

I substituted walnuts for her pecans since that's what I had on hand.

"Chicken" salad was never big in my family, so I didn't have any kind of family recipe to fall back on, or even a memory. I did remember that in my 20s (when still eating chicken), I had made a chopped chicken dish with curry....so I added about 1/2 tsp curry to this after I added the mayo and I really liked the added zing.

You can serve this on a bed of greens, in a sandwich or wrap as JL demonstrates or just eat plain.

I enjoyed this use of Soy Curls. I was also introduced to them in Portland at the same time as JL. They are a simple product (non-GMO) full of protein that you can put your own touch on in a number of ways.

Visit Butler Foods to discover where you can buy them in your area or online. I still like to order mine from Food Fight Grocery in Portland.

Friday, September 13, 2013

Vegan MOFO: Fry-it Friday–Beggin' Strips

I do miss a BLT. Not that I miss eating animals, I just miss that mix of flavors. A number of vegetarian "bacon" substitutes have crossed my path, but they have fallen away for various reasons. One was not vegan, and the most current one in our house (Lightlife Smart Bacon, which The Girl loves) is based in wheat gluten and expensive! That whole BLT thing is nearly lost to me now–I don't eat bacon, tomatoes give me reflux and wheat bread gives me IBS. I'm fine with lettuce, thank goodness and avocado (a favorite add-on) is still a staple for me.

So what's a vegan, refluxing, cramping girl supposed to do?

Come up with a bacon substitute, for one thing.

This is my own creation, although I'm sure others out there have come up with the same thing. I just tried this out in my kitchen and I like it. My inspiration was realizing I could cut my tofu very thinly and fry it. But I am not a consistent slicer. The truly inspired moment came when I gazed upon a kitchen implement–the cheese slicer (still in our house because The Man still eats dairy cheese).

Oh, you say I can use a cheese slicer on firm tofu and get a consistent thin slice of tofu? And it will approximate a slice of bacon? Yes. Approximate is the key word here. It's close, it's not exact, but it's a start. And a whole lot cheaper than a $5, 5 oz box of vegan bacon slices.

And even though this is "Fry-it Friday" I give alternate directions for baking this. I know some of you prefer to reduce oil consumption. And, it's less messy. But it's Fry-it Friday for gosh sakes.

Beggin' Strips for Humans
(about 60 3" strips)

1 block firm tofu, drained of any water. I prefer the Wildwood brand vacuum-packed. About 12 oz.

1/2 cup Soy sauce or Tamari (wheat-free if needed) or Bragg's Liquid Aminos (salty!!)*

1 tsp smoke flavoring (I used Wrights Hickory)

Oil for frying or spray oil for baking.

Directions (How-to photos at bottom)
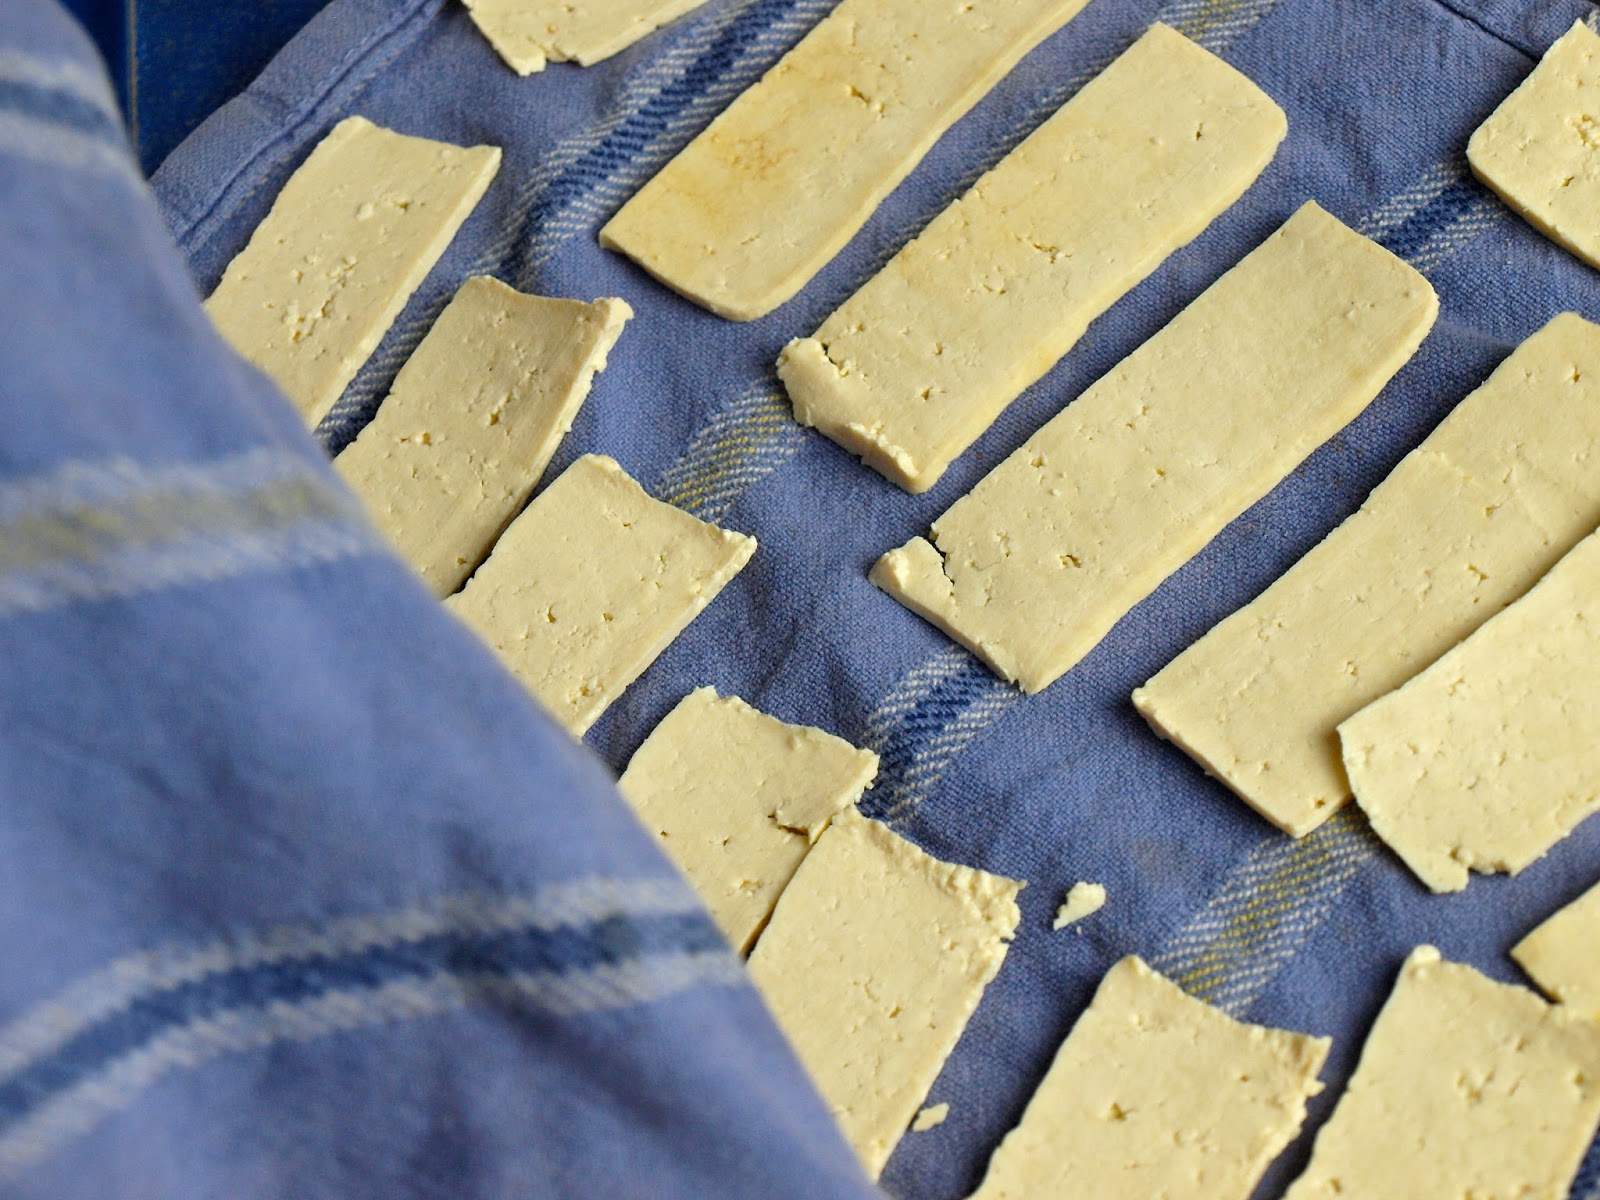
1. Use a cheese slicer to cut your tofu into any size or shape you like. To approximate a strip of bacon, cut your large block of tofu in half or thirds on its narrow side (this all depends on the size and shape of your block of tofu).
2. Slice from the narrow edge into as many strips as you can get. You can slice very thinly for a crispier bacon or a little thicker for a chewier strip. Your choice. Experiment. It's not rocket science.
3. Blot each strip carefully (especially if you've cut them really thin) between two paper towels or a clean cloth towel.
4. Mix your Soy Sauce/Tamari/Braggs in a bowl or deep dish with the smoke flavoring.
5. Let your strips soak in the liquid for a few minutes or a few hours.

Cooking
6a. Heat your pan and oil. Place soaked strips in oil carefully. They will splatter.
7a. Cook on one side a few mintues until "done" to your liking (brown, crispy, etc), flip and brown on other side.
8a. Let drain on paper towels.
OR
6b. Heat your toaster or regular oven to 350 degrees. Spray a cookie tray lightly with oil, place strips on tray, spray strips.
7b. Bake for about 7-10 minutes (depends on the thickness of your strips and your oven), then turn over, bake another 5-10 minutes.
8b. Drain on paper towels if needed.

Serving Suggestions
  • Great for a BLT of course. 
  • Just plain. Eat with sliced avocado. 
  • Wrap it up in a lettuce leaf or tortilla with some avocado and some vegan mayo. 
  • OK, you can add those tomatoes if you can handle them.
Final note: After I tried my recipe and wrote up these directions, I found that Bryanna Clark Grogan has a similar recipe and blog post at her site. Her recipe is a little more involved (more ingredients, but still simple) and she lets her tofu marinate much longer. But I think her post is worth a look It's a recipe from her own book (The Almost No-Fat Cookbook) that she tweaked a little. Visit her post at Vegan Feast Kitchen.

* Bryanna's post includes a link to information she gathered about sodium content and prices of several leading soy sauces and Bragg's. Be sure to use what best fits your health needs and budget. I tried this recipe with both Bragg's and Low Sodium Wheat-free Tamari, and they were much saltier with the Bragg's (a lot like the vegan jerky I buy now and then).

The How-to of it all...
 Slice like cheese. This is why a really firm tofu is necessary.

 Blot on paper or cloth towels so marinade will be absorbed better.

 Let sit in marinade a few minutes or a few hours.

 I realized I had a better container that would stay
sealed when flipped and distribute marinade better.

 Fry in some oil in the pan... or...

 ...bake in the toaster oven with sprayed on oil.

Blot on paper towels as last step before eating!


Thursday, September 12, 2013

Vegan MOFO: Thaw-it Thursday–Amy's Dairy Free Rice Macaroni and Cheeze

 Amy's Dairy Free Rice Macaroni and Cheeze

 So I guess I am going to be quite lazy on Thursdays after all and just thaw something I like! This is one of my favorite comfort foods, and since it's not the cheapest frozen convenience product out there, it's a treat for now and then. It heats in the microwave in under 5 minutes, is thick and creamy and just enough for a meal. (To be healthy, I should make myself a nice salad. Uh huh, yeah, I'll do that....)


When I'm eating nightshades, I also add a few drops of sriracha sauce to give it a little heat. Not much, just some added flavor. The pasta is probably a bit on the mushy side, but hey, this is a frozen gluten-free product and I think it's just fine. Sometimes I add some extra pasta and some vegan sour cream or cream cheese to stretch it a bit. Also great with some vegan chili thrown in. (Chili-Man Chili is our favorite canned chili at our house. The hubbie can use a can opener and the DD loves the chili.)

Thumbs up for Amy's GF, Non-dairy Rice Macaroni and Cheeze

Monday, September 9, 2013

Vegan MOFO: Mash-it-up Monday–Copenhagen Clockwwatcher

 This Mash-it-up Monday sandwich is my mom's creation. She came up with this incredible mash up of flavors when she and my dad owned a small "Northern European" restaurant in Stockton, California. (St. George and the Duck on St. Mark's Plaza, in case anyone was wondering.)

I have veganized her Copenhagen Clockwatcher, which is much easier to do these days than back when she created it (ca. 1977) when there was no such thing as vegan mayo or vegan cream cheese. Or if there was, no one in our family was aware of it. There was one tiny health food store in town and only crazy people shopped there.


The Copenhagen Clockwatcher
Makes one open-faced sandwich

1 slice of bread toasted (Traditionally, my mom used a light rye. You can use a GF bread.)
Vegan Mayonnaise
Vegan Cream Cheese
Chopped Peanuts
Chopped Tomato

Directions
Lightly toast your bread. (opt.)
Spread a medium-thick layer of cream cheese on your bread.


Spread a medium layer of mayo on top of the cream cheese.


Layer your chopped tomatoes over the mayo. (You may need to dry your tomatoes a little if they are watery.)

Sprinkle chopped peanuts over the tomatoes.
Broil or toast for 5-10 minutes or heat in the microwave for about 30 seconds.
Eat! (Knife and fork work better than hands with this sandwich.)

Friday, September 6, 2013

Vegan MOFO: Fry-it Friday

This is a re-post from my new Coastal Vegan Cave Girl blog. 
It's vegan, it's Paleo and AIP (AutoImmune Protocol) friendly.
This is what I threw together after a day of not planning any meals–but I had stocked my kitchen with these fresh foods. I ate a little over half of this for dinner and the rest for breakfast the next day. Traditionally I would have served this with rice or another grain and my whole family would have eaten it. Since I plan on having rice now and then myself, I can see eating it that way, and reducing my portion with the addition of rice.


Bean There, fried that!
(Green bean/Kale/Carrot Stir-fry)
Serves 1-3
Protein per recipe: ~  9.2g

2-3 Tbs olive oil
1/3 onion, chopped
1 cup chopped carrots
1 1/4 cup green beans, cut 3-4 inches
2 tsp ginger juice* (or about 1 inch chopped/minced ginger)
2 tsp sesame oil
2 handfuls chopped kale

Medium to high heat. Heat oil in pan. Add onions until glistening. Add carrots, stir. Cook until tender, 3-6 minutes.  I added about a 1/4 cup water to the carrots and then let them steam with the lid on. Add green beans, cook about a minute. Add oil and ginger, stir. Add kale to the top and put lid on, let steam for a few more minutes. Total cooking time about 10-15 minutes.

Like with all stir-frys, try to keep your veggies bright and little crunchy. Right now I like things a little softer since I have a bad tooth. (Update: Tooth fixed!)

I used sesame oil for flavor even though it is a seed oil. The Hartwigs in "It Starts with Food"* feel such small amounts are OK. You can always omit this without a huge loss in flavor.

Tuesday, September 3, 2013

Vegan MOFO Love Me Tender Taco Tuesday: The Story of the Swedish Taco

For the month of September and for Vegan MOFO, Tuesday's theme will be "Love Me Tender Taco Tuesday."

A friend has been holding a Taco Tuesday almost every week and this last spring I was trying to find out if certain foods were giving me issues. This posed a problem on Taco Tuesday since I was often going off of all nightshades (tomatoes, peppers, chili, potatoes and even corn!) Just TRY and eat taco-like stuff without those ingredients!

Now to the story of the Swedish Taco...

Many moons ago, my dad was a middle school teacher in Stockton, California. He taught at Hamilton Middle School in the 1960s and 1970s, possibly into the 80s as well. My own memory fails me!

My dad's last name is of Swedish origin (Pearson), and he was an adventurous cook. I learned to love Chinese, Japanese, Mexican, German and all other sorts of ethic foods growing up when he decided to get creative in the kitchen.

His school had a big population of kids of Mexican descent and they dubbed the tacos my dad would bring to school functions, "Swedish Tacos." I learned about this years later from one of his students. For some reason, dad put little bits of potato in his ground hamburger, he said it helped absorb the oil.

After I became a vegan, I often recreated this taco filling mix with Gimme Lean sausage and, yes, little bits of potato. Since I've been gluten-free, however, I've had to stick to non-seitan/wheat "meat" alternatives. And since I've been trying to eliminate nightshades (potatoes, tomatoes, peppers, eggplant) from my diet, it meant I had to forgo the potato, too!

Let tempeh (soy-only) and sweet potatoes come to the rescue! Sweet potatoes are in a different family from the white potato, and are not a nightshade, and therefore, "safe" for most of us trying to avoid the nightshades.

This is a wonderful filling for corn tortillas, or flour tortilla burritos. Since I'm also trying to avoid corn these days as well as wheat, I have photographed them on some home made GF teeny tiny tostadas. I followed a simple recipe for them I found online. I'll post another one later I'm anxious to try. I have yet to find a really good commercially made GF "flour" tortilla that tastes good, doesn't give me TMJ or folds without cracking!


Mr. Pearson's Daughter's Swedish Taco Filling

1       package (8 oz) soy-only tempeh, crumbled
1       medium sweet potato, cooked and cut into small cubes
1       small onion, chopped finely
2       cloves garlic, minced
1/2    tsp ground cumin
1/2    tsp ground coriander
1/2    tsp chili powder (omit if nightshade-intolerant)

Oil of choice for frying

Directions
1. Crumble tempeh by hand or lightly with a food processor. Don't blend too long, you want it to be crumbled, not a big glop. Put in bowl. Add spices and mix well.
2. Fry onion and garlic in a large pan in water or oil until done. (5-10 minutes).
3. Add some oil to the pan and fry the tempeh , stirring often so it doesn't burn, but also letting it brown.
4. Add a little more oil to the pan and add sweet potato, stir to fry and brown it a litttle, mix with tempeh.
5. It's ready to eat all by itself or add to tacos, tostadas or burritos.

Green Sauce
I like to make a dressing of whatever I've got on hand. This is a base of vegan sour cream and vegan cream cheese, mixed with some lemon juice, parsley and spinach, blended in my Vitamix. Add some avocado to it for a nice touch of guacamole taste.

Sunday, September 1, 2013

Vegan MOFO Psychedelic Sunday Rockin' Mockin' Toona

Psychedelic Sunday is so named because of a new book/cookbook I am reading called "Dropping Acid: The Reflux Diet Cookbook and Cure." It's not vegan, but it does have many vegan or vegetarian recipes or recipes that can easily be made vegan. I've been having an issue with what seems to be known as "Silent Reflux." My doctor thinks its GERD, but I'm not convinced. My first line of defense is usually "what am I eating that could be causing this?" or "what else can I eat that will help me?" Dr. Jamie Koufman believes that a low-fat, low-acid, alkaline diet will help this condition.

Rockin' Mockin' Toona is my version of her "Marc's Tasty Tuna Salad." Well, in fact, it's not even close to her version cause it's MY version of tuna salad!

Be sure to scroll to the bottom to see all the versions of things you can make with this basic vegan "Tuna" salad.

For all you non-vegan folks who might be making this for your loved one (or the one you want to love!), just think what a great picnic lunch this would make! And if he/she is gluten-free, too, definitely make it a salad on a bed of lettuce or stuffed in a tomato or on some nice GF bread.  (Just maybe take an enzyme tablet in case the garbanzo beans decide to create a little uncalled-for music!)

Rockin' Mockin' Toona Salad

1 can organic garbanzo beans
4 stalks celery, chopped finely (about 2/3 cup)
1-2 spring onions, chopped
2 Tbs pickle relish
1 Tbs lemon juice (about 1/2 lemon)
2 tsp kelp granules*
1/4 tsp garlic powder
1/2 tsp salt
1 Tbs mustard
2-4 Tbs vegan mayo

Alternative options: tomato, bread, corn chips, lettuce, meltable vegan cheese.

*I was out of kelp granules, which I think helps to give it a "fishy" tuna taste. Instead, I had some toasted nori snacks on hand and I carefully chopped up 4 of the little sheets. I think you could also chop up a regular sheet of sushi nori and get the same result. I kept a little to garnish with.

1. Strain and rinse garbanzo beans under cold water. Shake dry and pat with a towel to dry a little more. Too much liquid and you will have a runny salad. Chop them in a food processor or by hand with a masher until they are about the consistency of tuna flakes. Put in large bowl.

2. Add celery, onions, pickle relish, lemon juice, kelp granules, garlic powder and salt to the bowl and mix thoroughly. You can leave out the lemon juice and/or the garlic if you know it causes reflux.

3. Add mustard and mix.

4. Add mayo one tablespoon at a time and mix well. This is high in fat, and you really only need just enough to make it a nice spread that holds together. Depending on your own tastes, you may like 1-4 tablespoons. I like it with 2.

Serving suggestions:
Here's where the fun begins...

1. Just eat it right now! Out of the bowl!
2. Chill and eat later.
3. Stuffed Tomato: Slice a tomato in half and scoop out a little from each half. Fill with Toona Salad. Guaranteed to impress your vegan. Serve on a bed of lettuce or a few pretty lettuce/kale leaves. Garnish with sprinkles of kelp or chopped nori. (Note: Tomato is not usually reflux-friendly.)
4. Make a sammy! Any old bread will do, but to make it special, try toasting the bread! Or lightly frying in a pan. My DH loves his Toona Sandwiches with crumbled corn chips, olives and pickle slices inside the sandwich!
5. Toona Melt!! I've never actually had a real Tuna Melt before, but this Rockin' Mockin' Tuna Melt is pretty darn tasty. My version: Toast a nice piece of bread that has been lightly buttered. Spread with Toona Salad and top with your favorite Daiya Cheese. Broil in a toaster oven until cheese is melted. Garnish with a sprinkle of paprika, chili powder (watch out for reflux) or curry.

Monday, October 8, 2012

Tofu Stir-fry

Sometimes I forget that a stir-fry is my best choice on a busy day when I haven't planned much. I threw this together quickly, especially since I had extra cooked rice on hand (Tip #2 of the day: always cook extra rice to get you through a few days!)

Tofu Stir-fry

2 cups cooked brown rice
1/2 cup sliced carrots
2 cups spinach
1 package firm tofu, cubed
soy sauce

oil of choice (used coconut oil today for extra flavor for the frying, and a little toasted sesame seed oil)

Heat your pan, then add oil to coat pan.
Add carrots, cook for a few minutes. Add the tofu and brown it. Add in rice. Top with spinach, stir it in until it wilts. Ready to eat!

And of course, this is the kind of meal you can just about any left-over to. Just cut them up to nearly the same size and put the denser ones in first so they can cook longer. You can also make this oil-free by frying in water, not oil.

Tuesday, October 2, 2012

Easy White Beans

I bought a pressure cooker earlier this year and I've been having a lot of fun with it. I had to be convinced that it would not fulfill my mother's stories of her mother exploding a pot in her kitchen.

Jill Nussinow, the Veggie Queen, has a great pressure cooker cookbook out and this is based on one of her recipes.


These days, however, I don't always follow recipes, but just throw in some soaked beans, the right amount of water, some veggie broth powder, some onions and garlic and there you go, you've got tasty beans. On this day I added some spinach at the end to wilt it and tossed it over some pasta.

Yes, this is where I get my protein. (One of the many places...)

Tuesday, August 28, 2012

Easy Tomato Sauce


I have to admit, I'm not really a fan of tomato sauce anymore. Somewhere in my 40s my digestive system began having a difference of opinion with my palate. This is sad, especially since a nice marinara sauce on pasta used to be a stand-by for me at non-veg restaurants. But alas, wheat pasta is a no-no these days, too!

But, I do still serve a red sauce to my family, and especially to my daughter, who loves her pasta with either red sauce, pesto or just veg butter and yeast.

Since no one here really eats a lot of red sauce at any one time, we ended of up wasting most of any jar we would open up for either a meal or a snack. I dislike wasting food and I dislike wasting money even more!


I think I have finally found a solution to my problem! After buying a pressure cooker recently, I realized I could easily make a simple red sauce with the canned tomatoes I have on hand and dried and fresh spices. I could control the sugar and the oil. And, I had just purchased a box of vintage jam jars and lids at a garage sale (thinking I would make some jam from the crazy cherry-plum trees that line out driveway). I soon realized, though, that those jars were the perfect size for how much red sauce we might use, even over the course of a few days. (Experience has borne this out. They are perfect!)

I whittled down a recipe I found on the internet (she must have been making pasta sauce for a huge Italian family) and simply put this in my tiny jars (which have sort of been sterilized), let them cool, and then stuck them in my freezer to pop out only when needed.


Here's the recipe I came up with. Of course, like any good cook, you can add things you like. But if you suddenly find yourself trying to feed a veg'n and all you've got in the pantry is some old cheesey or meaty jar of sauce, you can whip this up in an instant for a fresh "chef made" taste. (You don't really even need to pressure cook this, you could also just blend fresh or canned tomatoes and your herbs. Really. It works. I've done it.)

Simple Tomato Sauce
(Make this "Raw Vegan" by using fresh tomatoes and no bay leaf)

3 cans tomatoes (I used diced)
1 can water
1 small can tomato paste or sauce
1-2 tbs dry veggie stock
1-3 tsp of fresh or dry herbs/spices: basil, oregano, chives, onion
1-2 cloves fresh garlic or 1/2-1 tsp garlic powder
1 bay leaf
salt to taste

Optional:
Some red or white wine, vodka, veggies, olives, etc. Saute some onions first in oil or water.

Instructions:
Fresh raw: Just blend this in a blender. Serve.
Cooked on stove: combine all in a pot, simmer til hot or longer if you really want to reduce it and blend the flavors. Take out bay leaf before serving. (I used my pressure cooker. Around 15 minutes at pressure. Natural pressure release. Open lid away from you.)

I poured my sauce into small jam jars that I had boiled to sterilize. Since I wasn't being extra careful, I froze them instead of considering them "canned." Don't over-fill if you are freezing to allow for expansion.

Serve over regular pasta or rice or corn pasta for a fully gluten-free experience.

Monday, August 27, 2012

Easy Garden Wrap


My daughter attended a school with a terrific garden program from Kindergarten through 5th grade. The amazing teacher, Laurel Anderson, made sure the kids weren't just planting seeds or watering flowers. She had them FIXING and EATING the food that they grew. Once a week for two years, I had the pleasure of helping out with my daughter's class. Each week's class ended with a snack made by half the group and served to everyone. Because gardening is not just about plants. It's about food, cooking, sharing, serving, enjoying, discovery, health and community. Laurel got all that in in a 50 minute class.


One of the last meals we shared, and apparently one of the class' favorites, was the "Garden Wrap." It's presented here in a regular tortilla, but if you are gluten-free, you could use a rice wrap, nori or even just roll this up into a big piece of lettuce.


My daughter requests this dressing now. Laurel's original dressing called for yogurt, but I've veganized it to a soy or other-based yogurt with no problem. And because we now grow our own herbs at home, I can make this myself in the blink of an eye.


A wrap lends itself to any ingredients you have on hand.
These are my daughter's favorites. 


Harmony Garden Wraps

  Dressing (blend in blender)
  • 1/2 cup plain soy or other yogurt
  • 1 lemon, juiced
  • 2 handfuls of French sorrel (or other herbs- any bitter lettuce works)
  • 1 bunch chives
  • Herbs/salt – to taste
  • 2 cloves garlic
  • 1/4 cup -- 1/2 cup oil (optional)
Wrap Instructions:
  • Spread dressing on tortilla.
  • Sprinkle on sunflower seeds.
  • Grate a little carrot over it.
  • Add washed spinach/lettuce.
  • Roll it up carefully.
  • You can eat this whole, cut it in half or into little wheels if you are serving as an appetizer. 
That's a wrap!

Friday, July 29, 2011

Choriza Pizza


Vegan. Gluten-free. Yummy. Easy. One pan.

Cornbread base
1 cup cornmeal
1 cup gluten-free flour mix + 1/2 tsp xanthan gum
(or 1 cup regular flour)
1/4 cup sugar
4 tsp baking powder
1/4 tsp salt
1 cup vegan milk
1 egg replacer
1/4 cup vegetable oil  (or 1/8 cup oil + 1/8 cup apple sauce)

Toppings
1/2 cup or more corn kernels (can be fresh or frozen)
1 package Soy Chorizo
1/2 cup or more of vegan cheese

Preheat oven to 425 degrees.

Combine dry ingredients of cornbread base. Combine wet ingredients. Mix the two. Pour in lightly greased 8x8 pan.

Spread corn on top. Spread soy chorizo on top of corn. Layer cheese on top of chorizo.

Bake for 20-30 minutes. Let sit a few minutes before serving.

You can make this easier to make if you use a packaged vegan or gluten-free cornbread mix, but this one is pretty easy as it is.

 I used Bob's Red Mill Gluten-free Flour Mix and Daiya Cheddar Cheese.